But enough chit chat, here goes. I'll be totally honest and let you all know that I haven't actually finished making this bread yet - in case you missed that from the "part one" in the title. So, fun times, you get to learn along with me! I'm at about the halfway point in the process, so either later tonight or tomorrow I'll finish it up with how the bread turned out, and lots more lovely photos. Who knows, if it's better than my tried-and-true soda bread recipe, I might be making this from now on.
This is a very current photo of where the bread is at right now:

Awesome, right? I feel like it's going to take over the apartment, so if you don't hear from me again, you'll at least know what the suspect looks like.
"Five Minute" Artisan Bread
Makes approximately a crap-ton of bread
Ingredients:
1 1/2 tbsp. yeast (I used instant, but apparently it doesn't much matter what type you use)
1 1/2 tbsp. coarse salt - kosher or sea salt, both are fine
3 cups warm water
6 1/2 cups unbleached all-purpose flour, plus more for dusting (As the linked recipe states, you can swap out up to 1 1/2 cups for whole wheat/other flours, which I did)
cornmeal for dusting
First up, mix the salt, yeast, and water in a large (HUGE) mixing bowl - I used the one from my KitchenAid, since I've been eager to use the dough hook thing.
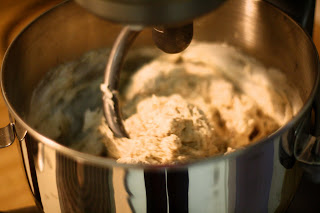
Then, add in the flour. Yes, it's really this easy. Now either stir like a champ until it's completely mixed, or if you're a cheater like me, 2-3 minutes on low with the dough hook should do the trick.
When it's all mixed, it should look approximately like this - kind of goopy, but that's okay. Cover it with a clean dishtowel and put it in a warm spot. My trick is to put the oven on very low, and put the bowl on the stovetop, which worked like a charm. Look at it, all nestled up for a nap!
Pretty soon your doughy little creation will grow...
...and grow....
Let it sit and rise for at least two hours - I've waited about 3 myself, and would wait more if I wasn't on a timeline. As it stands, my dough is looking pretty big and scary right now. I'm off to bake it up, I'll update again once I've finished round two and have an opinion on the taste!


No comments:
Post a Comment